
 English
 Chinese

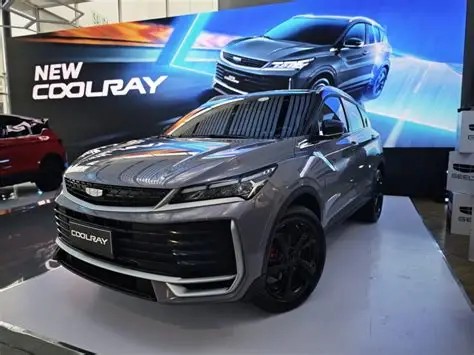
How to Find the Correct Geely Coolray Headlight Assembly Replacement
Encuentra el conjunto de faros OEM adecuado para Geely Coolray con el número de pieza correcto para el reemplazo directo del vehículo.
ابحث عن مجموعة المصابيح الأمامية الأصلية المناسبة لجيلي كولراي برقم القطعة الصحيح للاستبدال المباشر في المركبة.
Send Inquiry
Product Description
What Should You Check Before Choosing a Geely Coolray Headlight Assembly?
Begin with the vehicle record. Note the production year, market, trim, VIN, and whether the lamp is left or right. Record the original part number and photograph the label before removal. Coolray applications may share a similar outer lens while using different internal modules, brackets, or wiring. Compare mounting ears, locating pins, lens shape, and the gap to the grille and fender.
Inspect the failed unit to identify the actual problem. A cracked lens, broken bracket, cloudy surface, or water trace may require a complete assembly. A serviceable housing with a failed bulb or driver may need a smaller repair. If the lamp has impact damage, inspect the bumper and front-end mounts so you do not force a new assembly into a distorted opening.
How Do Lighting Functions and Electrical Details Affect Fitment?
List every function shown on the original assembly. These include low beam, high beam, daytime running light, turn signal, position lamp, and any leveling or adaptive feature. A replacement can fit physically yet fail if its control module, bulb type, or pin assignment differs. Check connector keying, pin count, polarity, rated voltage, and whether the assembly needs a separate ballast or has an integrated driver.
Confirm the lens marking and lighting standard for the vehicle market. Beam direction and cutoff geometry must match local road rules. Do not splice an unknown connector simply because the wires have similar colors. Use a wiring diagram, test power safely, and retain the old unit until the new lamp passes a function check.
Which Physical and Optical Specifications Matter Most?
Compare the housing dimensions, mounting-hole centers, bracket thickness, and adjuster locations. The rear of the assembly needs clearance from the radiator support and harness. A small interference can transmit vibration into the lens. Check seal surfaces and vent positions as well. Factory-style vents should equalize pressure without allowing water to pool inside the housing.
Optical quality matters as much as external fit. Look for an even reflector or projector surface, a clear lens without distortion, and secure internal shields. The beam should illuminate the road without glare. If the vehicle uses manual leveling, make sure the replacement retains the adjustment range and that the adjuster is not already at its limit.
How Should You Install and Aim a Headlight Assembly Replacement?
Disconnect the battery according to the vehicle service procedure. Protect painted panels and remove the bumper fasteners required to access the lamp. Compare the new and old assemblies on a clean bench before fitting. Transfer only approved components, use new seals where specified, and tighten fasteners evenly so the housing is not stressed.
After installation, test every lighting function. Check the connector for heat and verify that no harness is pinched. Park on level ground and perform a beam aim using the vehicle specification. Alignment should be checked with normal tire pressure and load. Confirm the lamp remains dry after a controlled water check, then road-test at night for cutoff, symmetry, and vibration.
Keep a short installation record with the replacement number, side, date, measured beam height, and any diagnostic codes. This record is useful when a vehicle returns with intermittent flicker or a leveling complaint. If the lamp is supplied with a separate controller, note its software or calibration status and protect it from splash water. Recheck fastener torque after the first road test if the service procedure calls for it. These simple records also make future parts identification faster because the next technician can compare the installed specification with the vehicle history instead of relying on memory.
Where Can You Confirm a Geely Coolray Headlight Assembly Part Number?
Use the stamped number, VIN, and measured dimensions together. Our auto parts catalogue helps narrow the application, while our product search and technical contact page provide additional routes for specification questions. Trustar support can review the evidence before you commit to a shipment. Keep the original assembly available until fitment, connector engagement, and beam aim are confirmed.
Why Consider Trustar for a Geely Coolray Headlight Assembly?
We focus on application accuracy, stable mounting geometry, and consistent optical performance. Trustar assemblies are selected against reference numbers, connector details, and dimensional checks so technicians can review the critical points before installation. Our support team can also help confirm the correct Geely Coolray Headlight Assembly replacement and related service parts when you provide the VIN, original label, and side position.
FAQ
Q: How do I identify the correct Geely Coolray Headlight Assembly replacement?
A: Match the VIN, model year, left or right position, original part number, connector, and lighting functions. A photo-only match is not enough.
Q: Can a Geely Coolray Headlight Assembly replacement use a different bulb type?
A: Only if the vehicle wiring, housing, optical design, and local approval all support it. Keep the original specification unless a documented conversion is available.
Q: Why does a Geely Coolray Headlight Assembly fog after replacement?
A: Brief condensation can clear through the vent, but persistent water indicates a seal, vent, or housing problem. Inspect the perimeter seal and rear cover before driving in heavy rain.
Q: Does a Geely Coolray Headlight Assembly replacement need aiming?
A: Yes. Any assembly removal can change the lamp position. Aim both sides on level ground and confirm the cutoff is even and free of glare.
Keyword: brake disc replacement, brake disc specifications, OE reference, minimum thickness, lateral runout
Back
Send Inquiry